Introduction: In a world of mass-produced accessories, adding a touch of your personality to your belongings can make them truly one-of-a-kind. Drawstring bags, known for their versatility, are an excellent canvas for DIY customization. By infusing your creativity into these bags, you can transform them into unique pieces that reflect your style and interests. This article explores the world of DIY customization and how you can bring your drawstring bag to life with imaginative designs.
1. Design Inspiration: Begin your DIY journey by gathering inspiration. Look to your favorite colors, patterns, and themes. From nature motifs to geometric shapes, the possibilities are limitless. Explore online platforms, art galleries, and even everyday objects for ideas that resonate with you.
2. Materials You’ll Need: Before you start, gather your materials. You’ll need fabric paints, markers, stencils, fabric glue, patches, rhinestones, and any other embellishments you envision. Ensure that your chosen materials are compatible with the bag’s fabric.
3. Planning Your Design: Sketch your design on paper first. Consider the bag’s dimensions and the areas you want to customize. This step helps you visualize the final result and make any necessary adjustments before applying your design to the bag.
4. Painting and Coloring: Fabric paints and markers are your best friends for adding color to your bag. Whether you’re aiming for a vibrant masterpiece or a subtle touch, start with a light layer and build up the colors. Allow each layer to dry before adding more to prevent smudging.
5. Stencils and Patterns: Stencils are fantastic tools for achieving intricate designs with precision. You can purchase stencils or create your own. They are especially helpful if you’re not confident in freehand painting.
6. Adding Textures and Layers: For an extra dimension, experiment with textures. Use sponges, brushes, or even your fingers to create different effects. Layering colors and textures can give your design depth and character.
7. Embellishments and Patches: Fabric glue is perfect for attaching patches, rhinestones, beads, and other embellishments. These elements can add a pop of glamour or a touch of whimsy to your bag.
8. Personalization with Initials and Quotes: Consider adding your initials, a meaningful quote, or a significant date to make your drawstring bag even more personal. Hand-lettering or stencils can help you achieve polished results.
9. Sealing Your Design: Once your design is complete and dry, seal it with fabric sealant or clear varnish to protect it from wear and tear. This step ensures that your hard work lasts for a long time.
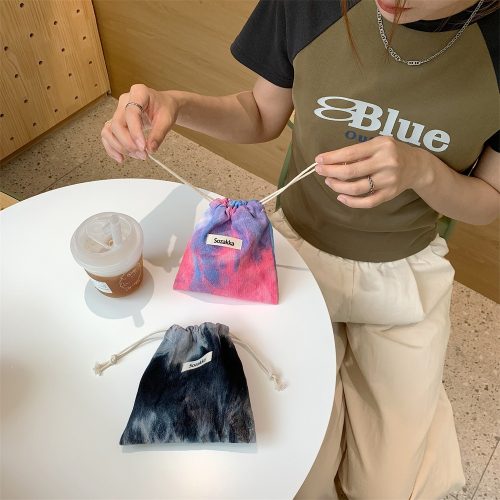
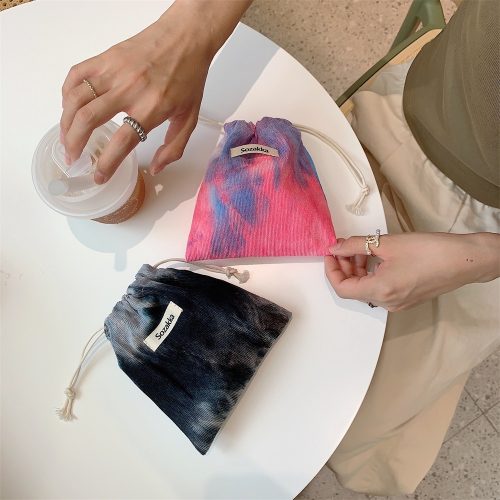
10. Showcasing Your Creation: After the customization process, proudly showcase your unique drawstring bag. It’s a piece of wearable art that tells a story and sparks conversations. Use it to carry your essentials or even as a decorative element in your living space.
Conclusion: DIY customization offers a wonderful opportunity to infuse your drawstring bag with your individuality and creativity. From simple patterns to intricate designs, your bag can become a true reflection of your style. Through this process, you not only create a functional accessory but also embark on a creative journey that’s deeply satisfying and fulfilling. So, gather your materials, unleash your imagination, and let your drawstring bag be a canvas for your unique expression.